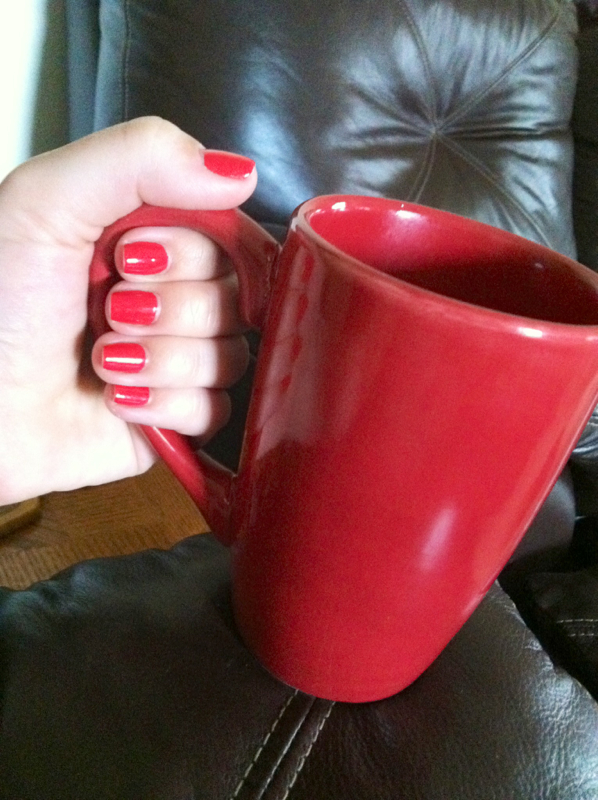
Taken 10 days after application.
I've been trying out a new technique for applying my nail polish and I must say that it is fantastic!
The best part is that you don't have to pay to get gel nails in a salon, you just need to make a quick trip to Sally Beauty!
Here's what you will need:
The best part is that you don't have to pay to get gel nails in a salon, you just need to make a quick trip to Sally Beauty!
Here's what you will need:

- Gelous Advanced Nail Gel Coat ($5 at Sally)
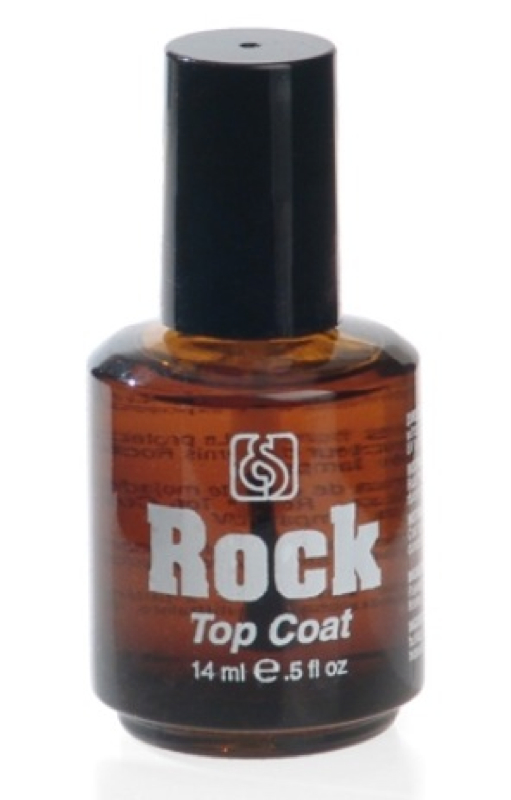
- The Rock Top Coat ($8 at Sally)
- Any polish of your choice. I'm wearing OPI My Chiuaua Bites.
How to do it:
1. Prep your nails! Take off any old nail poish, file and shape your nails, push your cuticles back and gently buff each nail.
2. Clean the surface of the nail! This is very important! This step gets rid of any debris or oil on the nail plate. I use Acetone Nail polish remover (the pink bottle at Sally) or apple cider vinegar. I don't think either is better then the other, so use whatever you have on hand. I do this with a paper towel. A cotton ball will leave little fibers that you won't see until you start to apply your polish. Let it dry.
3. Apply 2 coats of the Gelous! Make sure to seal the free edge (tip of the nail) Allow 3 minutes between each coat to let dry.
4. Apply 1 coat of color and let dry for 5 minutes. Make sure to seal in the free edge!
5. Apply another coat of Gelous and let dry for 3 minutes.
6. Apply 1 more coat of your color and let dry for another 5 minutes.
7. Finally! Apply your top coat. Then go outside and relax! This top coat gets harder with UV exposure, so a few minutes in the sun will help your gel manicure to last even longer.
Be sure to leave plenty of time to dry. This technique is time consuming but worth it!
Let me know if you try it and how it works out for you!
Please excuse the poor quality of the photos. I'm on vacation and blogging from my IPhone!
 RSS Feed